Thanks to its lightweight format with an array of possibilities, everything just got a lot simpler. Its reduced thickness means it can be cut quickly and adjustments can be made on-site with tools for ceramic tiles.
Step 1
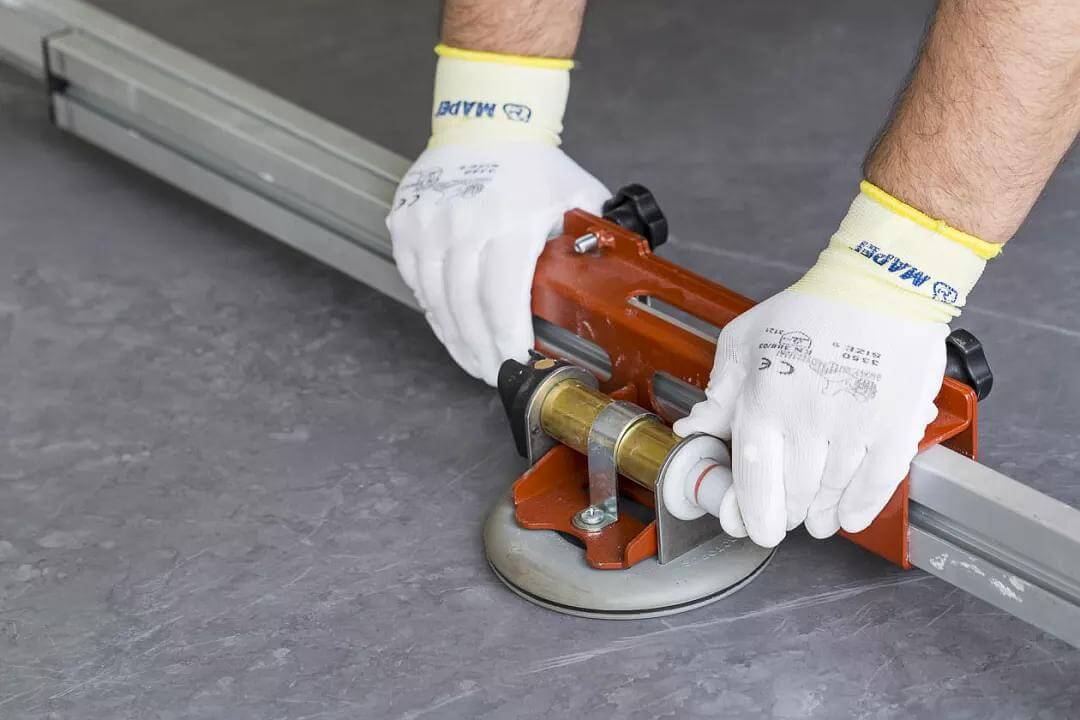
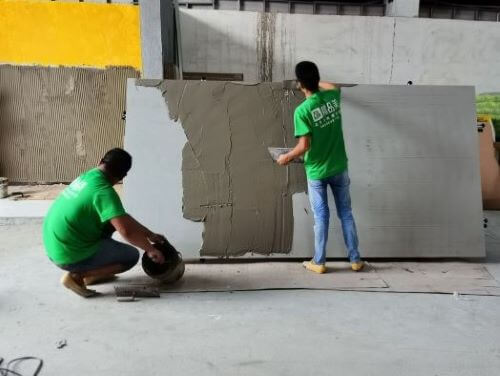
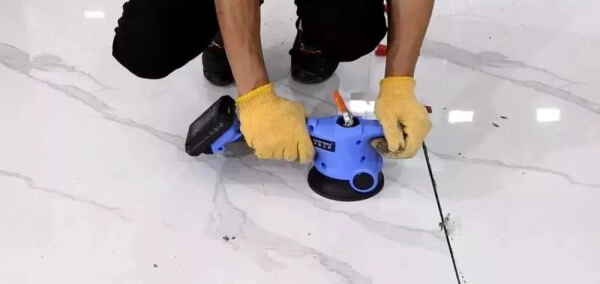
Professional tools for sintered stone slab paving: special suction cups for ceramic tiles, mobile fixing racks, movable support for ceramic tiles, spirit levels, laser levels, wall and floor meters, tooth trowels, steel trowels, tile levelers, push piers, Plate vibrator (with rubber pad), caulking scraper, electric cutting machine, tape measure, cleaning sponge, electric mixer, mixing bucket, scraping plate, gap retractor, hole locator, manual cutter, drilling machine.
Step 2
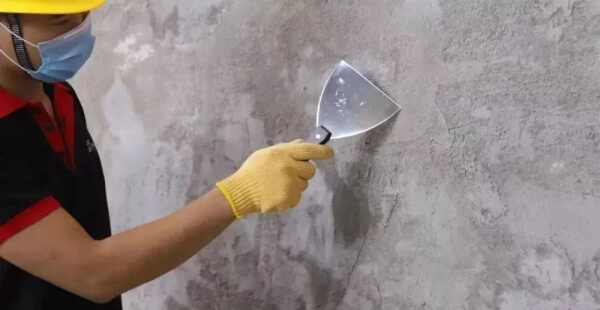
Basic treatment before construction paving, check the verticality, flatness, squareness of the yin and yang angles of the base layer, hollowness, and cracks of the plastering layer, and clean and deal with them.
Before paving, check the verticality, flatness, squareness of the yin and yang angles of the base layer, hollowness and cracks of the plastering layer, and clean and deal with them.
Thanks to its lightweight format with an array of possibilities, everything just got a lot simpler. Its reduced thickness means it can be cut quickly and adjustments can be made on-site with tools for ceramic tiles.
Step 3
Handling and processing
When handling slabs, use hand pump suction cups or professional lifting bars that meet the requirements for lifting, and place them on a truck for transportation. It is strictly forbidden to land on the ground with a single corner during transportation and placement. In the process of paving the slabs, processing steps such as cutting and chamfering, opening-round holes, and opening square holes are required.
Cutting Edege of sintered stone

- Chamfer the edge of sintered stone

- Cutting the square hole
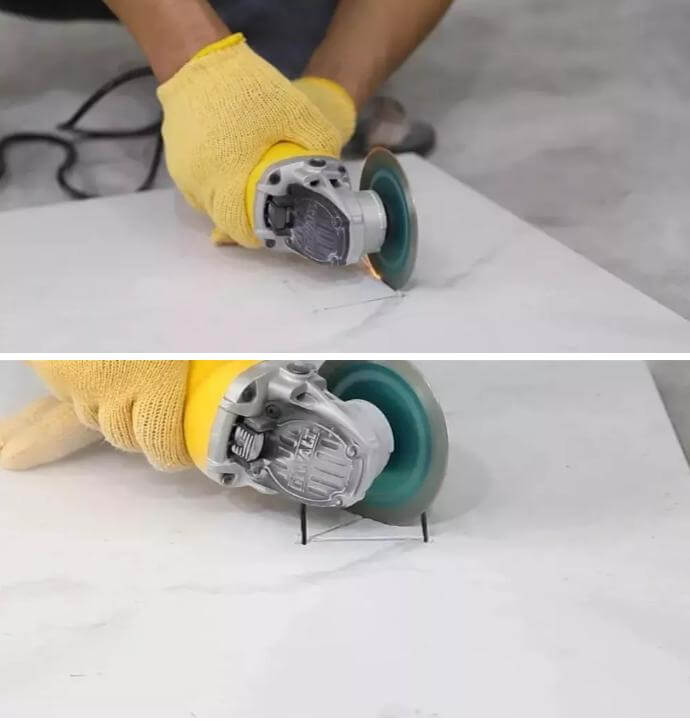
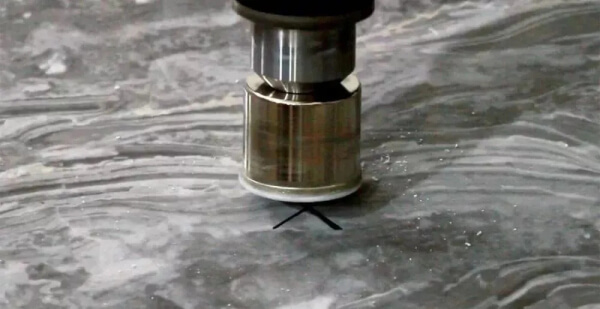
- Cutting the round hole
Step 4
Special adhesive
Professional tile glue should be used when paving sintered stone slabs. It is recommended to use flexible tile glue or tile glue products of C2ES and above. It is forbidden to use marble glue as an adhesive for paving rock slabs.
Step5
The process flow of slab wall/floor wet pasting
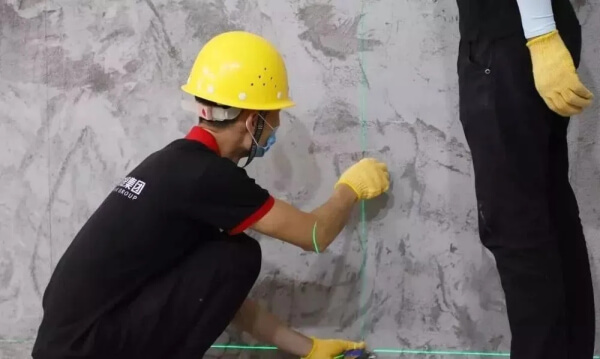
01 Elastic line division / After processing the base layer according to the basic wall treatment and fine leveling process, determine the segmented grid elastic line and the pop-up reference line and set the standard point of the finished surface thickness to control the surface thickness and vertical flatness.
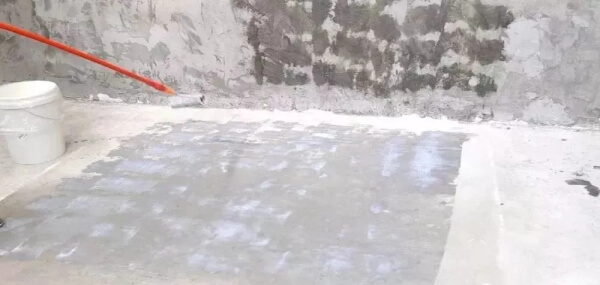
- 02 Brush the interface agent/ Use a roller to evenly brush the interface agent on the wall/floor adhesive surface, and leave it for 2 hours before sticking.
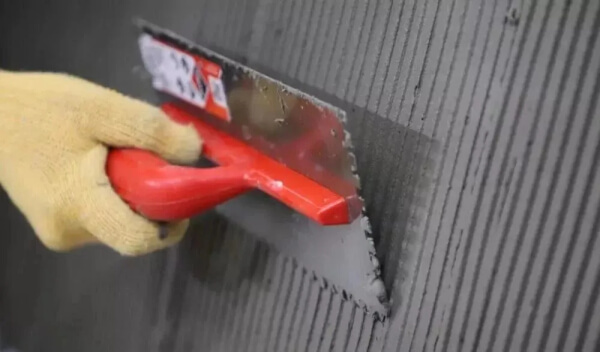
- 03 Preparation of bonding material / The mixing ratio of adhesive and water should be prepared according to the product specification. Use a slow-speed electric mixer to stir evenly, then let it stand for 5-10 minutes, and then use it after a little stirring. Adhesive surface cleaning / Adhesive surface should be free of dust and foreign matter, so as to avoid the influence of the adhesive effect, it is advisable to use a sponge to clean the adhesive surface and pay attention to check whether the plate is cracked. Adhesive application / Apply a layer of evenly mixed adhesive on the sticking surface of the board and the base surface, and then use a toothed scraper to scrape the glue at an angle of 30°. The direction of the teeth of the board and the base surface adhesive should be parallel, and Chamfer the adhesive on the four sides. The thickness of the base layer and board adhesive should be 3-6mm; it should be uniform, full and uninterrupted.
During the construction of porcelain slab paving/sintered stone slab pasting, it should be pasted along the reference line in the order from bottom to top and from inside to outside; two or more hand pump type steel frame suction cups should be used for transportation; after the adhesive application is completed The rock slab should be pasted to the base surface within 20 minutes; the padding should be used for protection when paving.
04 Flatness adjustment/ After the rock slab is pasted on the base surface, knead and press it and then adjust the rock slab to be flat with a vibrator. It is advisable to use a pad to adjust the level or verticality of the surface material. Between the rock slabs, use a leveler base and The inserts are leveled, and the gap width of the rock slab should be adjusted with a gap expander.
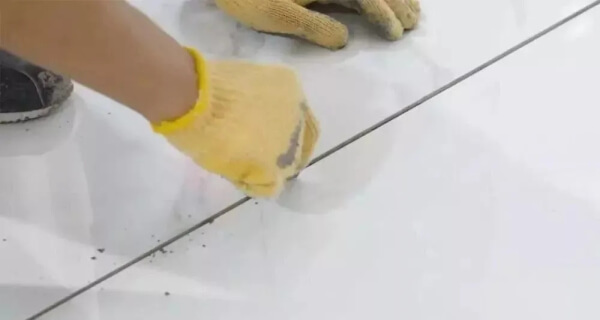
- 05 Clearance of gaps / Ground construction should be enclosed before the final setting of the adhesive and no stepping is allowed; after the application of the adhesive, before the initial solidification of the adhesive (within 24-48h), use a joint cleaning tool to remove the adhesive adhering in the gap. The gap should be uniform and the width should be the same. The gap-filling material should use a flexible gap filler, and the width of the gap should not be less than 3mm.
- 07 Surface cleaning / After pasting, the surface of the sintered stone slab is found to be contaminated. The dirt should be removed without causing the sintered stone slab to shift.
After 7 days of construction, a neutral detergent can be used for thorough cleaning
